When I was completing my masters thesis, I used EC2 Machine p3 instances along side my ‘on prem’ devices. As I was moving various code/models all the time these instances where on, the bills where racking up – sure it was great to have such powerful GPU’s on demand and I could easily setup EKS (Kubernetes) with GPU nodes via IaC and CI/CD Tooling, but when the bill arrived it brought home how important it is to have good MLOps methodologies in having efficient use of delivering models for production usage.
Not wanting to incur such regular costs and knowing i would need a server for at least the next 2 to 3 years, I explored how I could improve upon my ‘on prem’ setup, which consisted of a ASUS Tuf gaming laptop with a RTX-3050 and 4G of NVRAM and a Server Tower with a RTX-2080 with 12G of RAM.
What I needed was a GPU(s) that was good at inference and a training, with enough capacity to hold the models I am developing and some of the widely used LLM’s available. Doing some research it became apparent that the Dell R720 was a server built for hosting graphics cards and the NVIDIA P100 & P40 where good matches for my research requirements.
Alot of help came from the ‘the data daddi’ you tube channel, his videos are pretty well put together and easy to follow.
The best GPUs for your money video back by the extensive Tim Dettmers blog provides a plethora of good choice and analytics in choosing a GPU – what was also good is that eBay had a seemingly good supply of both P40 and P100 GPUs at a reasonable price.
| GPU | Architecture | CUDA Cores | Memory (Gb) |
| P100 | Pascal | 3584 | 16 |
| P40 | Pascal | 3840 | 24 |
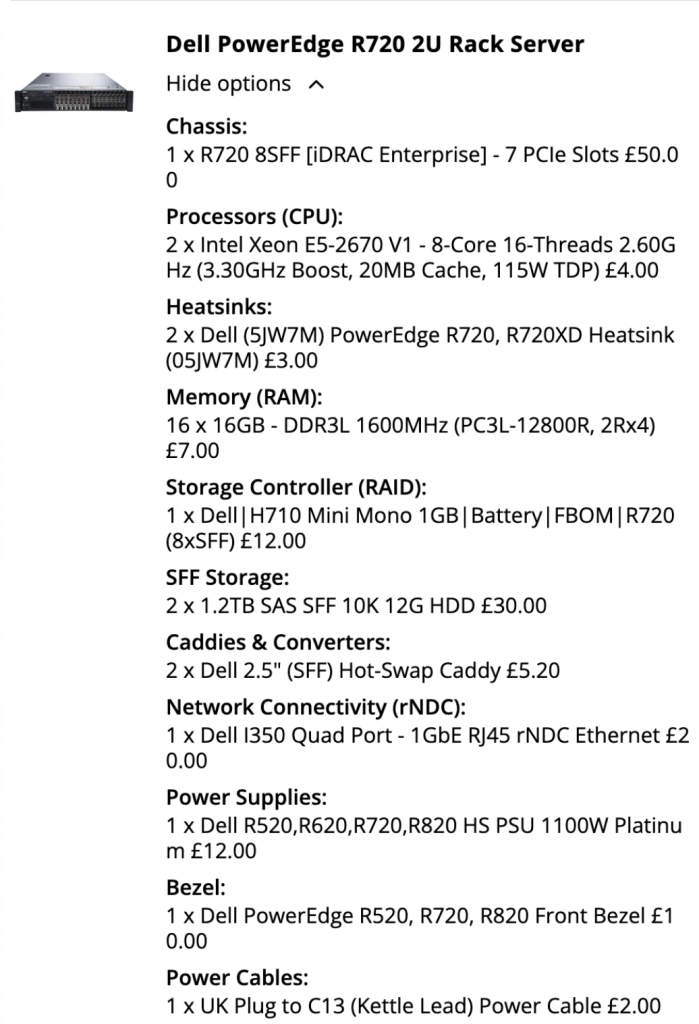
The R720 was purchased refurbished, at a very affordable price from bargain hardware which specializes in refurbished servers at affordable prices. They have a great range of hardware, such as storage arrays, various sizes of servers and all built to order.
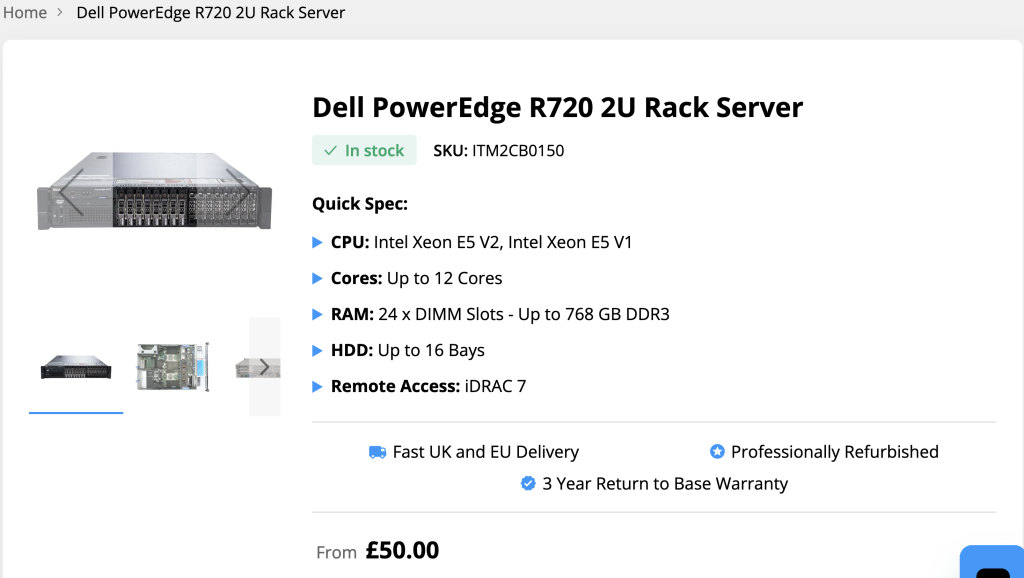
I went for a minimal server build, starting with only 2 SAS Drives, but with sufficient CPU and Memory to test the GPU’s when installed. With the GPU’s capable of drawing up 300W each, getting the 1100W power supply was required.
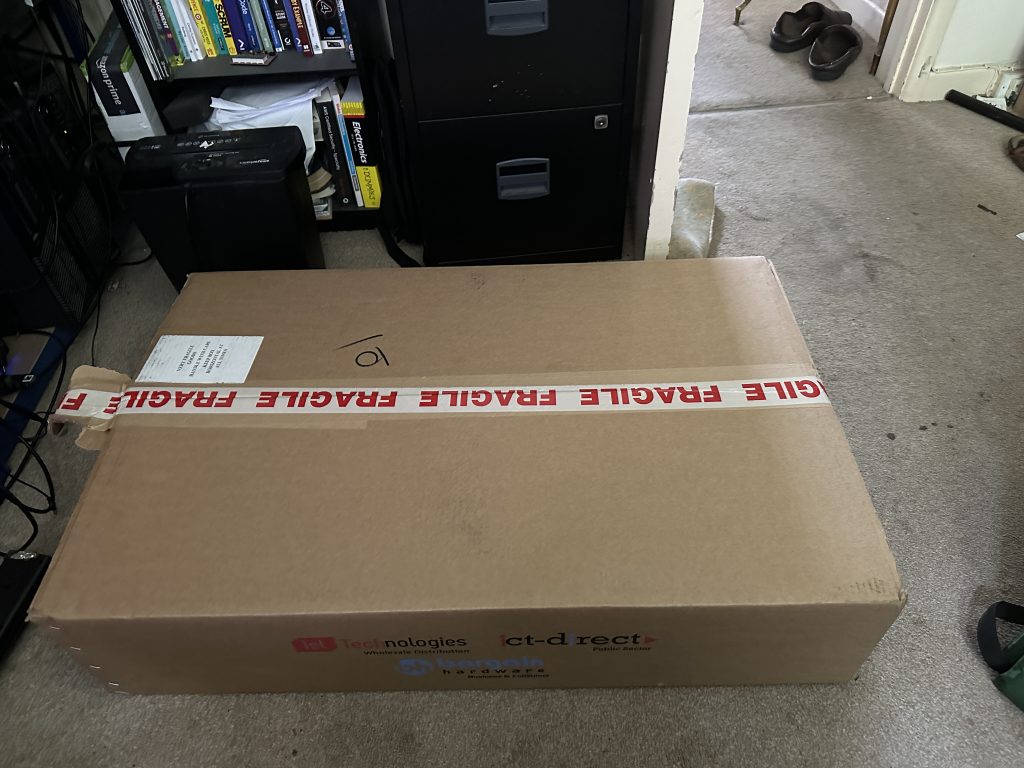
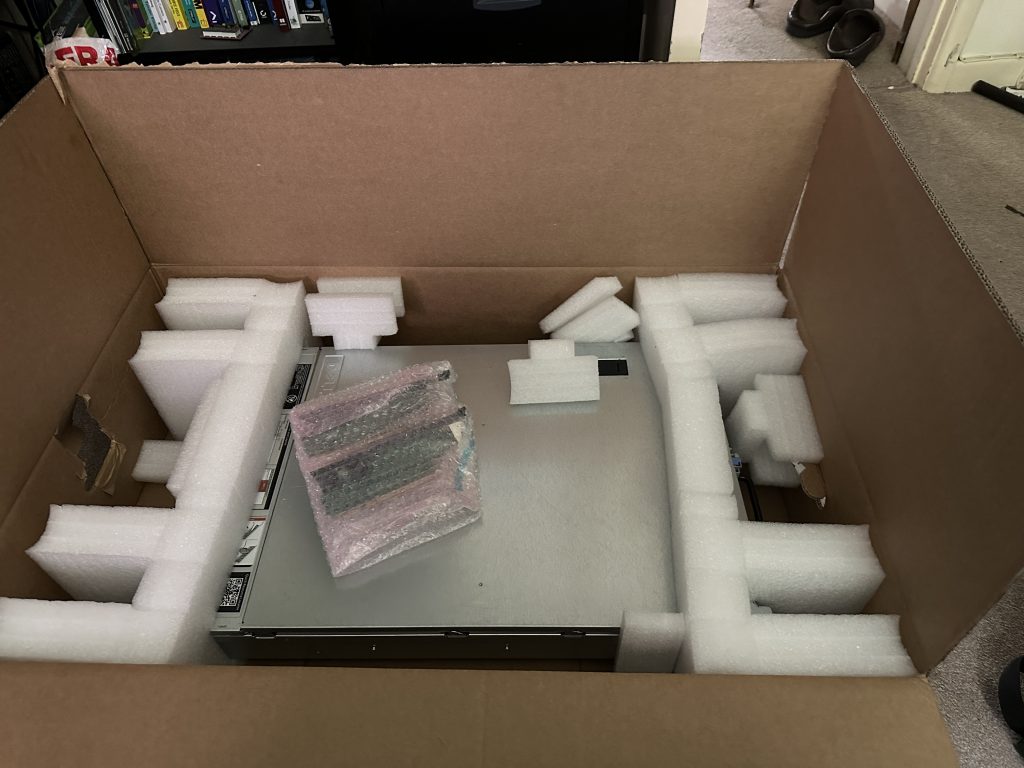
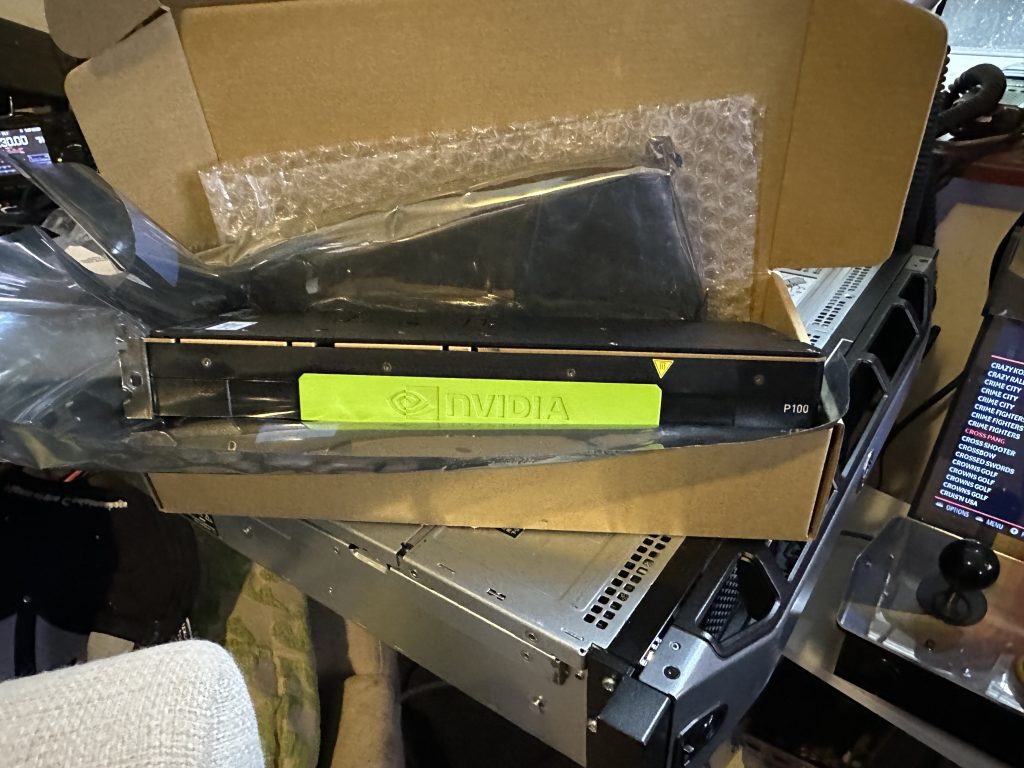
The servers and GPU arrived very quickly, with the GPU’s arriving from China in under a week and the server built to specification in a similar amount of time. I was very impressed of the packing of both as can be seen in the pictures below.
I did have to source the correct cables and PCI riser for the 2nd slot. I found this on eBay and also reached out to bargain hardware, who whilst they didn’t list them on their website, did have them in stock, so was able to add 2 to my order (which you can see on top of the server in the picture)
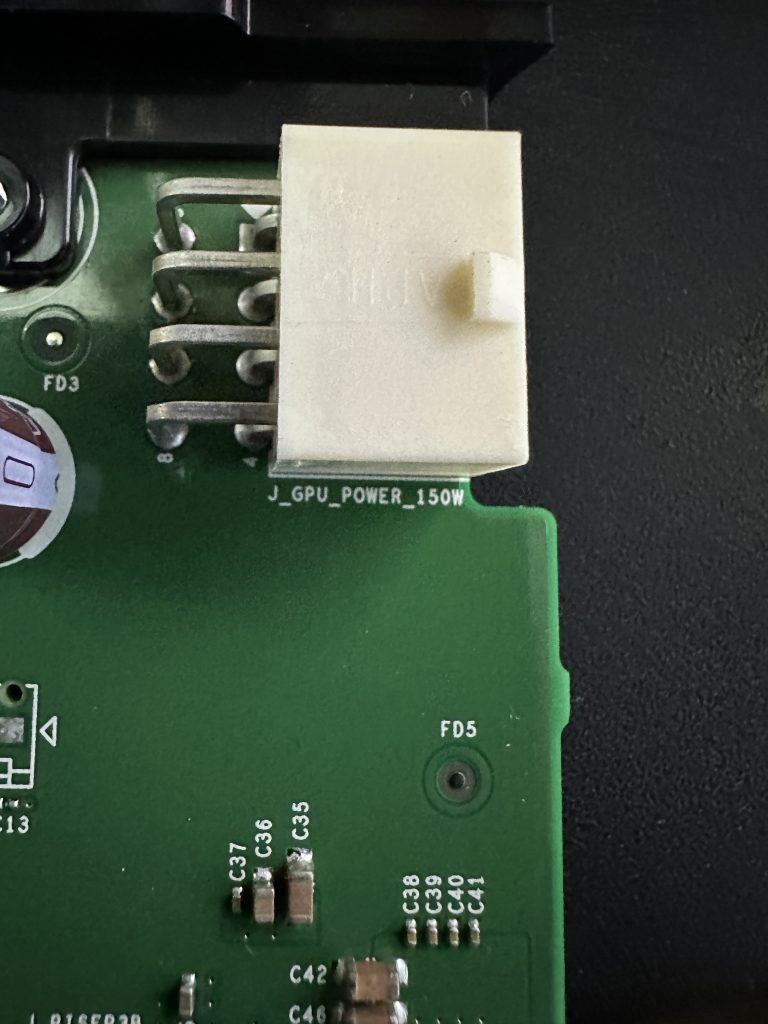
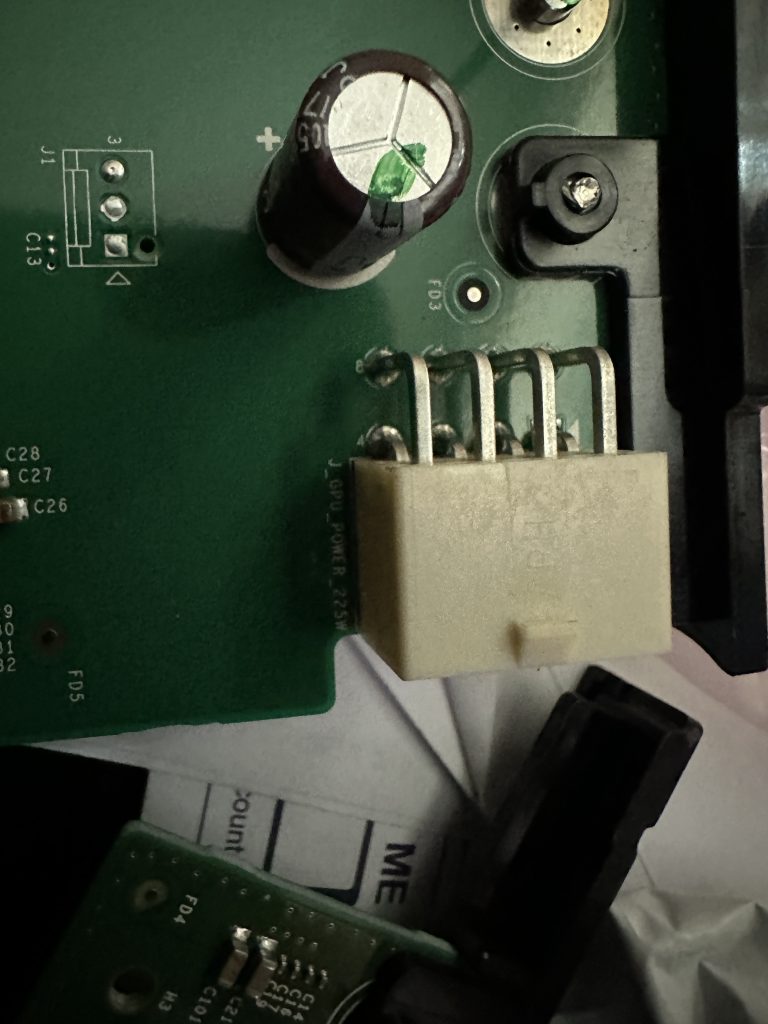
Thanks to the instructional videos, its shown that the wiring output between the Dell risers and NVIDIA GPU’s are not compatible with standard cables, so I had to source those. I was only able to find these via amazon.com in the US, but again, shipping was very quick (under a week) and with no import duty.
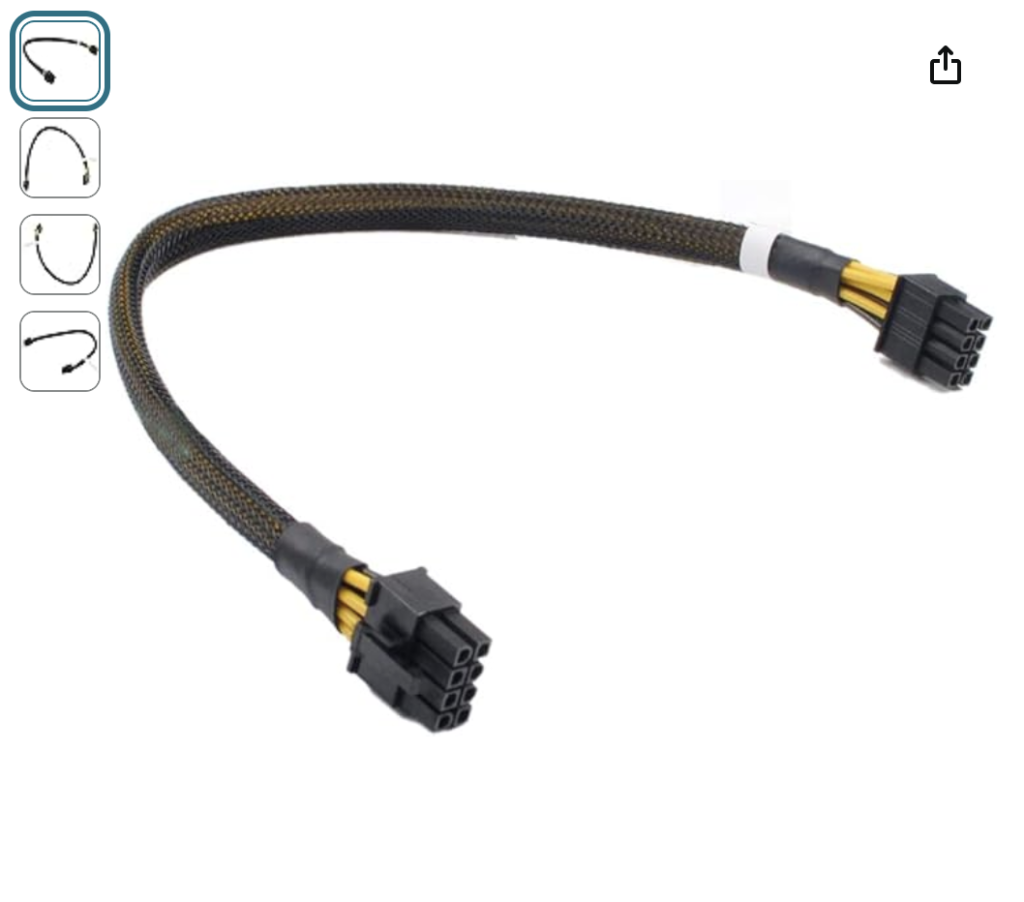
I could of modified the supplied cables which came with the GPU’s from China, but as I wanted the longevity and confidence that the cables would last a good amount of time, went for tested and manufactured to specification cables.
With all the correct components and cables, I went about installing the graphics cards in the server. The DataDaddi video shows how to install a single P100, and for installing both i the P100 and P40 I worked from removing riser 1, and installing them with plenty of space in the server itself, although routing the cables was quite tricky!
I installed Ubuntu server image via USB easily enough, I would also advise not installing the drivers at initial install time, I found that the DKMS modules had either not built correctly and the nvidia-smi program was missing. This was easily resolved by removing the packages, rebooting and re-installing once the server was built.
With the server up and running with the GPU’s I could order more storage. Ideally you should get as big and as fast as possible, but being on a budget I settled for the same SAS drives I had originally purchased. 6 more in a RAID 5 configuration saw my capacity increase to over 7.6Tb – configuring the drives on the R720 and the mini raid controller was pretty easy, it had been a while since I had done this on an actual server (any one remember sun storage arrays that used an Ultra 5 to mange them ?)
Filesystem                         Size  Used Avail Use% Mounted on
tmpfs                               26G  2.4M   26G   1% /run
/dev/mapper/ubuntu--vg-ubuntu--lv   98G   78G   15G  84% /
tmpfs                              126G     0  126G   0% /dev/shm
tmpfs                              5.0M     0  5.0M   0% /run/lock
/dev/sda2                          2.0G  244M  1.6G  14% /boot
/dev/mapper/ubuntu--vg-lv--0       7.5T  108G  7.0T   2% /data
tmpfs                               26G   88K   26G   1% /run/user/1000
I setup the IDRAC port so I could run the server headless, this was really useful as it really is a full blown virtual console, that can be used to go into the various BIOS screens, also once the server was built i could connect into the root console, but later added a desktop.
The WietseWind github repo has a great script to install racadm via native packages, which is better than using ‘alien’ which failed to work on Ubuntu 22.04. I was then able to setup the scrips provided so the native Dell fans could be used to cool the GPU’s. Whilst the fans are noisy at the high speed, it does ensure that the GPU’s are not throttled.
I done some basic tests for the GPU’s and then set about installing ollama and the llama3:8b-instruct-fp16 model, then the containerized version of OpenWebUI.
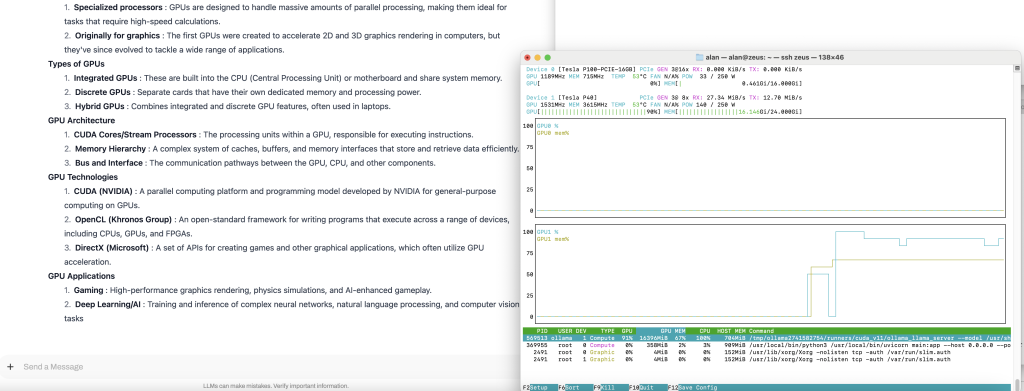
The GPU capacity and CPU speed was more than enough to run a interactive session via OpenWebUI. So I had my fully functioning GPU server at a very affordable price !
I’ve made a quite long video which covers the build process using the videos above.